Hello and welcome to my review of How to Draw by Scott Robertson with Thomas Bertling!
Or as I like to call it: “An Art Book and a Science Book had a Baby”.
There are ten chapters in total, and I’ll be taking you through each of them. I’ll give you an overview of what is taught and what I found to be helpful.
This book is ridiculously well written and illustrated. Personally, I bought it initially because of pretty pictures… but then I noticed those tiny things surrounding the images. They were words. And my goodness they are indeed insightful.
This book is 208 pages of beautifully drawn and well written lessons on how to draw objects and environments from your imagination. The paper quality is amazing and the pages are designed extremely well (the graphic designer on this one is Cecilia Zo). It is published by the always fantastic Design Studio Press.
How to Draw by Scott Robertson starts the reader off with a quick lesson on the basics of perspective. It then builds up to more complex perspective methodologies. It’s set in quite a linear format, which I like. So, before you try to replicate what’s taught in a certain chapter, make sure you’ve learned everything from the previous chapter – cos you might be needing it!
Chapter 01: Drawing Materials and Skills
Choosing your Drawing Materials, Pens and Paper
Robertson and Bertling state that you don’t need to blow the budget when choosing materials – all you need is a few basic tools.
This chapter starts off by listing out some tools which you may need when learning basic and advanced perspective. This book is predominantly aimed at traditional drawing using pens, pencils, paper, rulers and stencils.
These guys are pretty chilled about what materials to use, but I love it how they draw the line at using an eraser. There’s a section called No Erasing!, where it says that you’re going to have a LOT of construction lines on your page. If you erase anything, you’re going to lose your lines. Instead, they recommend you just draw lightly, and then clean up your drawing later with an overlay. Nice!
The Basics and How to Practice
After they discuss materials, they then take us through the very basics of drawing. This includes the importance of drawing with the whole arm, drawing only one line and ghosting (which is the drawing equivalent of taking practice swings before you hit the golf ball).
This chapter also quickly gets you up to speed with one, two and three-point perspective, drawing boxes, curves and ellipses.
Chapter 02: Perspective Terminology
In this section we are encouraged to refresh / familiarize ourselves with perspective terminology. This includes how to define your POV (Point of View), COV (Cone of Vision), and how to find your vanishing points on the picture plane.
The different cones of vision are likened to different lenses on a camera. And just like with a camera, we need to be careful not to distort our lines. There is a handy section in this chapter where we are recommended which cone of vision to use for each type of linear perspective.
This was pretty cool to learn – in the past, I have often wondered why perspective fails me when I get to the corners of my drawing. Haha, we’re here to learn, people!
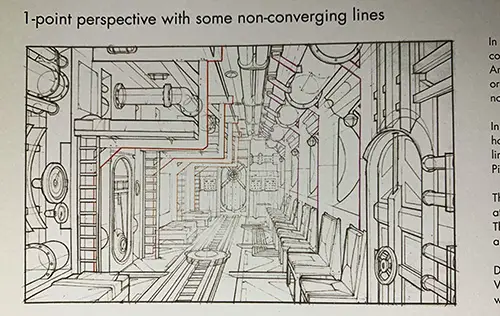
There’s a particular drawing in this chapter which I really liked. It’s a drawing by Danny Gardner of some kind of ship interior (I’m guessing a submarine). It demonstrates one-point perspective with non-converging lines. I was super impressed by how Gardner created such an interesting and detailed image, with a whole lotta dividing and ellipses. It shows that despite all the fancy perspective rules, sometimes one-point perspective is enough to get the message across. Check out his work at http://dannydraws.com/
Chapter 03: Perspective Drawing Techniques
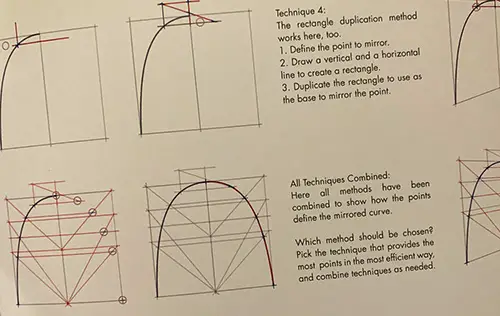
This chapter starts out with some wonderfully simple tutorials on how to divide and multiply rectangles and boxes in perspective. It then moves onto how to create a mirror image of horizontal planes in perspective.
But then hoooo boy things ramp up – by the end of the chapter, we are mirroring three dimensional curves. Or in my case, looking at Scott Roberston mirroring three dimensional curves. This guy is like a modern day da Vinci.
While the last part of this chapter is pretty complicated, I seriously love how this book slowly shows you step by step how to do the basics first, before showing you how to do the hard stuff. Warms me heart!
Chapter 04: Creating Grids
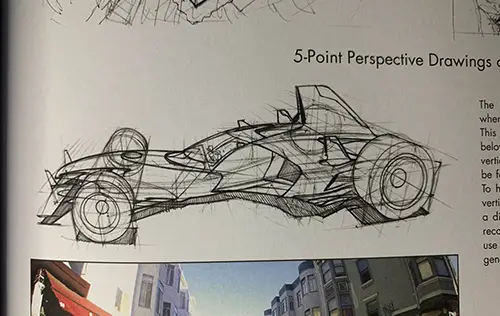
This chapter starts out explaining the importance of grids when drawing in perspective. They show examples of different perspective grid types: one-point, two-point and hot dang even five-point perspective.
This chapter features some more step by step tutorials, bringing together the horizon lines, vanishing points and cones of vision mentioned in the previous chapter.
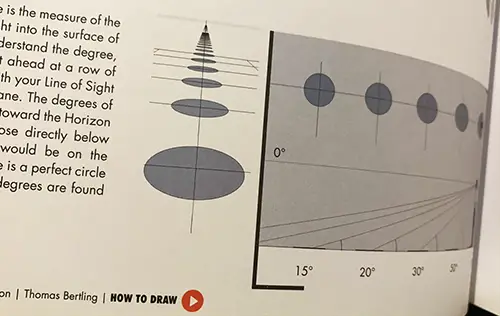
Personally, I learnt quite a lot in this chapter around how the horizon line can be divided up into specific sections to establish cone of vision and vanishing points.
If you’re ever without a computer or a photocopy machine, this chapter also includes something called the Brewer Method, which shows how to manually construct a grid when your vanishing points are off your page. It was named after Bill Brewer, who originally taught this method at Art Center College of Design. Which is kinda sweet.
The aesthetics ramp up in this chapter a bit. We are introduced to some really beautiful drawings, complete with shading, hatching etc.
There are some great guest artworks in this chapter, but the stand-out for me were Roy Santua’s drawings which included architectural cutaways, naval cutaways and by golly even some exploded views! I love Santua’s line work, his hatching and shape design.
Roy doesn’t mess around: https://www.roysantuaart.com/
Chapter 05: Ellipses and Rotations
Ellipses are “simply circles in perspective”. And if you loved squished circles, then this is the chapter for you.
Robertson states that the accuracy of an ellipse can make or break a drawing, so he has deemed it appropriate to have a whole chapter dedicated to learning to draw them properly. Nice!
The chapter starts out with ellipse basics and terminology. An ellipse has two axes – a major axis and a minor axis. The major axis is the line that divides the ellipse in half across its longest dimension. And, you conversely, the minor axis divides the ellipse across its narrowest dimension.
The first major rule given is to ignore the major axis completely. This is because the minor axis always intersects the center of a foreshortened square that surrounds the ellipse. I never realised this, which was pretty cool to discover!
The chapter has several tutorials throughout such as:
- How to place a circle in perspective
- How to create a cube using ellipses
- How to offset an ellipse
- How to divide an ellipse
- How to place a circle on a sloped surface
Chapter 06: Working with Volume
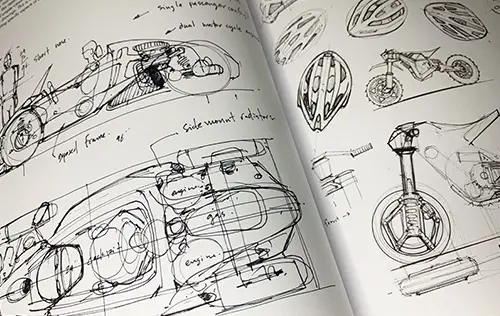
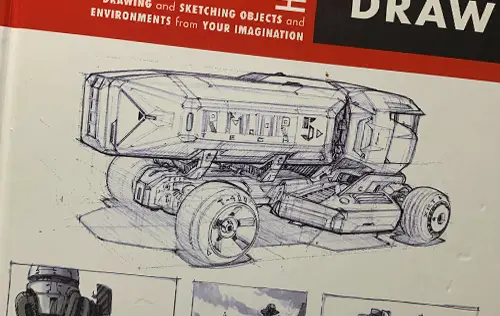
This chapter focuses on how to draw complicated symmetrical forms in perspective. The first images in this chapter are concept sketches of cars, motorcycles and helmets (beautifully) drawn from very simple angles/views.
Robertson recommends us to first draw our concepts from a draft view (side, top or front view). This will help us establish the proportions before we need to worry about perspective.
Once we are happy with our design, we will then need to transfer it into perspective. For the record, we are now on page 85 and it’s absolutely fascinating. It shows us how to “transfer a side view into perspective”. This is done by placing our draft view into a “bounding rectangle”.
Once our draft has a bounding rectangle drawn over it, then we can draw it in perspective. Hooray!
The chapter continues on to show how to draw all of our side views into a three-dimensional drawing (putting together our X, Y and Z section drawings).
There is a stunning double page spread near the end of this chapter called “Contour Lines, Overlapping and Line Weight”. This section shows how we can use line variation and some shading to make these super complex drawings more presentable (and understandable).
Chapter 07: Drawing Environments
This has always been my favorite chapter of this book. If you’re into architecture, the
First few pages have got some beautiful artwork by David Hobbins and Thom Tenery. Their work in the entertainment industry is awesome (and not the overused version of the word –literally awesome).
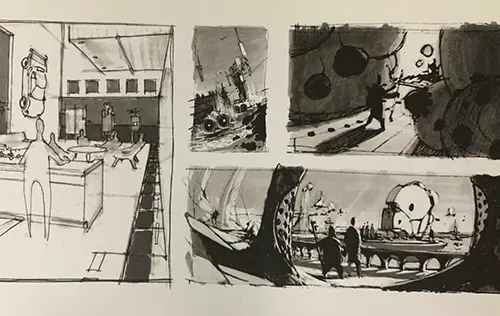
At this stage in the book we are now seeing drawings that incorporate full scale value from dark to light. The spread on pages 112 and 113 have some incredibly beautiful thumbnail sketches. They are small, quick drawings but with the most fascinating compositions. The confidently loose lines with Copic marker shading give so much life to each sketch.
Near the end of the chapter is a fun tutorial on how to draw an outdoor environment. Robertson starts with a very light gray copic marker sketch of a landscape and building. He then adds the details (figures, horizon line, vanishing points etc.) to create a small landscape with a surprising amount of detail. The details are achieved thanks to a 0.25 Pilot Hi-TEC pen (but mainly thanks to Scott’s hand)
Chapter 08: Drawing Aircraft
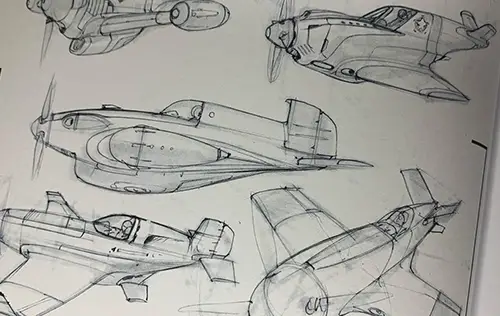
The chapter title gives it away, this is indeed very aircrafty. The first few pages are photographs of airplanes. There are some pretty creative airplane designs in this book, but before we can get to those, we are encouraged to do a little research to have some understanding of airplane anatomy. This is to understand not only how airplanes look, but also how they work.
Robertson recommends that in order to create imagined aircraft, we first need to build up a very strong visual library in our heads. This could involve going to museums, building models and repetitively copying as many airplanes from observation as possible. We will then be able to take our understanding and build on it to create something from our imagination.
Next up we are introduced to a fantastic double page of loose concept sketching. On our left are rough, yet accurate under-drawings of planes (complete with perspective lines). These are drawn with a very light gray Copic marker (with a value of 0 or 1).
Then! On our right as those same under-drawings, but now they have been drawn over with a black Zebra ballpoint. Each design has a solid outline, filled with beautiful panels which also act as contour lines.
Before we get into drawing super cool aircraft, we are first shown how to use a “paper plane perspective grid”. At this stage in the book I’m starting to think that Scott Robertson is a gentleman who genuinely wants to guide us along concepts gradually instead of flooding our tiny minds with his ridiculously amazing works of art.
The paper plane concept is a great one – it helps us get our shapes right, before we try and draw more complex forms.
This is definitely the longest chapter in the book. It will give you a good dose of inspiration and education!
Chapter 09: Drawing Wheeled Vehicles
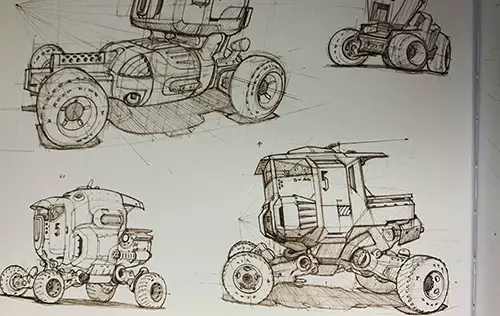
This chapter starts with visual research and then takes us through a mock design brief with the objective to design a sci-fi hot rod from another world. Creating a brief for ourselves is done to help focus our imagination.
In Robertson’s design of the hot rod, he starts (as we all should) with four side views before committing to some more complex views. He then brings one of his designs to life with three different renders of the same drawing. One was done with marker, wax pencil and chalk, another digitally rendered in grayscale, and the third is a digital render in full color.
We are then introduced to “packaging”. This refers to all of the important, functional parts of a vehicle: where the engine goes, where the passengers sit, the vehicle height etc.
Another key term is “hard points”. This is a common term to describe the parts of the vehicle that cannot be changed (due to engineering constraints).
Robertson states that when designing an object, whether a fantasy spaceship or a power tool, we must always keep packaging at the front of our minds. It is crucial in helping our designs look functional and believable.
Just like the aircraft section of this book, this chapter has some excellent step by step tutorials on how to set up grids and draw cars in perspective.
Chapter 10: Sketching Styles and Mediums
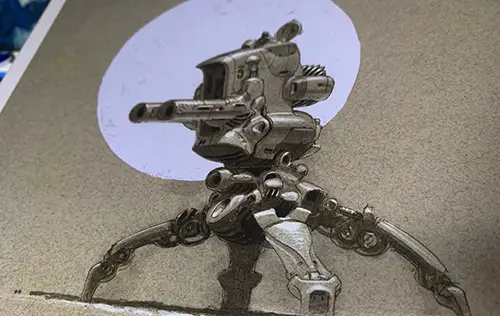
The final chapter is kinda like the dessert after a healthy and delicious nine course meal, with some really fun and inspiring vehicle designs and landscapes.
It is emphasized that although these designs are well rendered, they still have strong perspective drawing as a foundation. And without this foundation, the value and color would not hold up as well on their own.
What I love about this chapter is that it showcases different ways to communicate a visual idea through a variety of mediums such as ballpoint pen, Copic markers, pen on newsprint, gouache and even brush pen. While some people probably ask Robertson “what pen do you use?”, I get the feeling that he’s just walking around his house, picking up whatever’s lying around, and then proceeding to smash out masterpieces. I guess that’s what strong foundation does to an artist!
Conclusion!
This is one of those potentially life changing art books every artist should own. I recommend it for anyone interested in advanced perspective, vehicle design and architecture. But! Will reading this book through once make you draw like Scott Robertson and his mates? Probably not. This is a book for people willing to embark on the journey of learning how to improve their technical drawing. And it will require hard work, repetition and practice. This book is not a silver bullet, it is the map for a challenging journey, and it’ll guide you right to your destination. If you practice regularly and follow what’s inside, then you’re gonna get good.
Many thanks for reading this review of How to Draw. If you are interested in purchasing this book, feel free to use my affiliate link at no extra cost to you.
All the best,
Malcolm Monteith
Melbourne
1 thought on “How to Draw by Scott Robertson [The Ultimate Review!]”