Being an Illustrator can mean a few things. Are you just wanting to do it for fun? Is it a profession you want to pursue full time? Or maybe you’re a graphic designer and want to add an extra string to your bow (cos we all love the ol’ graphic design and illustration combo). Whatever your motive is, learning illustration will be beneficial to you professionally and personally. So how do you become an illustrator?
Becoming an illustrator involves learning a variety of skillsets such us drawing, color theory, inking and graphics software. Illustrators also need to be able to know how to interpret a brief, how to tell a story through their illustrations and how to work with clients to create the desired final product.
In this article, we will take a look at all the different things needed in order to become an illustrator. From learning to draw to having a network of clients.
Put on your illustrator pants and let’s get into it!
Do I need to Study Illustration?
Unlike jobs such as Dentistry and Law, Illustration is a profession that you can teach yourself without having any formal training. This does not mean that illustration is easy. Learning how to draw, interpret a brief, manage clients etc. is hard work.
If time and money are not an issue, then studying illustration will no doubt be beneficial. But in most cases, a tertiary qualification in illustration is not a prerequisite to working as an illustrator.
For companies hiring illustrators, they will be a lot more interested in applicants’ portfolios over their degrees.
Imagine two illustrators applying for the same job:
- one has an amazing portfolio and no degree
- one has an average portfolio (with an amazing degree!)
If the hiring manager is smart, they will be hiring the ‘unqualified’ one with the amazing portfolio.
If you are wanting a qualification in illustration, make sure you back it up with a solid body of work that will make people want to hire you.
How to Teach Yourself Illustration
The great thing about illustration is that you can teach it yourself. But you will need to put in the hard yards.
There are many paths you can take in order to teach yourself illustration. The great thing about self-learning is that you will be missing out on the whole crippling college debt thing (and possibly gain work experience, while your college counterparts are still going through school).
If you do decide to bypass formal education, you will need to work extremely hard to make sure you are learning all of the elements needed for illustration. This includes:
- drawing
- traditional and digital mediums
- how to follow a brief
- how to build a portfolio
For more info on this, check out my article on how to become an illustrator without a degree.
Learn to Draw
If you think you need to know how to draw in order to become an illustrator… then you are 100% spot on.
And if you tell me you can’t draw, then I do not believe ya! Anyone can learn to draw – ESPECIALLY if you genuinely want to draw and are willing to learn.
Think of a time that you downloaded and played a game on your phone consistently every day. Were you amazed at how good you got at it? Drawing is the same. If you do it enough, you will see results pretty quickly.
Here are some tips for learning how to draw:
- Draw every day (for at least 30 minutes)
- Study (but don’t steal) from the artists you admire
- Draw things that you are interested in (otherwise learning to draw is gonna be a snooooze!)
I also have some drawing mini courses if you’re interested in the style I draw in.
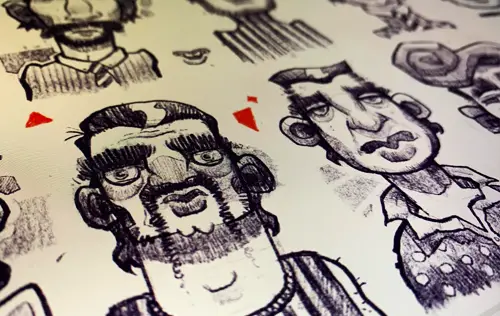
Practice Sketching
It’s better to spend an hour filling up a page with sketches, than it is to spend an hour on just one drawing.
Spending time every day sketching is like a pianist doing their scales. It will help you improve your designs, gestures, and problem solving. This will come in handy when creating your finished pieces for your portfolio or for a client.
Make Mistakes
When using your sketchbook, make sure that you throw perfectionism out the window please! Don’t be afraid to make mistakes when drawing. The great thing about making mistakes is that you get to learn from them.
The more mistakes you make – the more you’ll proactively think about why some things don’t work in your sketches. This will in turn make you proactively think about what makes a drawing look good!
Learn Story Telling
What’s more interesting to you:
- An illustration of a person standing front-on, OR
- an illustration of the same person picking his nose with a surpised look on his face?
I know I’ll be excited by the one with his finger in his nose. Why? Cos the character is actually DOING something. But what is he doing? What did he find in his nose?!
If you can incorporate a story into your illustrations, then your audience is going to connect more with your work.
A story could come in different forms: It could be the posture of the character, the facial expression, or maybe it’s the clothes he is wearing.
Next time you are sketching, think of a back story, an emotion or an action that you would like to convey in your pictures. Incorporating a story into your work might help you discover a few tricks in the process!
Learn Industry Software
If you want to become an illustrator, you will need to get used to doodling and sketching with pencils and paper. Smashing out some concepts on a Post-It note could lead you down a path to something great!
But where do you go next once you’ve come up with a great rough sketch?
Now… I’m not your boss… but man oh man you gotta learn how to illustrate digitally as well.
There will always be demand for traditional illustrations, but many of your illustration clients will be needing digital illustrations for their projects.
The advantages of digital illustration is that you will generally be able to create illustrations quicker and easier. And if you are running an illustration business, this is definitely a good thing.
Personally, I have found that traditional drawing helps my digital illustration and vice versa. Try and keep up with both of these and you will eventually become better in both.
For more info, check out my article on software for illustrators and digital artists.
Get a Graphics Tablet
I say this because I care: Give your mouse a break and get a tablet.
It doesn’t matter how fancy your mouse is. It might even be diamond encrusted. It might have been a gift from the Pope.
All that doesn’t matter when you put it next to a cheap ‘n dirty graphics tablet.
Learning to draw using a graphics tablet can take some getting used to. Some people can pick it up right away, while others might take a bit longer.
If you have tried using a graphics tablet and it’s just too hard, then check out my article on how to overcome common challenges when using a graphics tablet.
Remember that if you practice enough, the tablet and stylus will become an extension of your arm.
Anyway! I have tried a variety of Wacom tablets over the years. They are allll excellent. Of course, the more expensive ones will have more features and be more responsive, but even the bottom of the range tablets will do the trick just fine.
For more info on which tablet you should buy, check out my article on Wacom tablets for beginners.
Learn About Color
Color is important. Color can be used to convey an emotion, tell a story or just to make something look straight up pretty!
Now we all know that the primary colors are red, yellow and blue. And we know that with these colors you can make orange, purple and green.
But there are so many different shades and saturation of these colors too.
and these colors will take on different meanings depending on what other colors you surround them with.
Do you have an illustration that has an overall cool, green tone to it? Add in elements of bright red to your focal point. Red is the complementary color of green and will help make your green illustration pop!
You could do this with any illustration that has a strong color theme running through it. A predominantly purple illustration could perhaps do with a bright yellow focal point. And so on.
What about shadows and light in your illustration? instead of adding black, it’s better to give your shadows a cool color like blue or purple. For your light area, instead of white, it’s better to warm them up with a bright orange or yellow.
Experiment with your colors, but careful not to get too monotonous. Here are some general rules to look out for:
- An illustration that has warm colors for both its shadows and lights will look muddy.
- An illustration that has cool colors in the shadows and the lights will look washed out and chalky.
So have a play and explore the different color combinations that work for you. Just remember that a color will take on a different meaning depending on what other colors are surrounding it! That’s pretty neat.
Learn About Line Variation
Ever drawn in Photoshop with the pressure sensitivity disabled? It is painful. Drawing that line with a fixed width is more boring than watching grass grow.
So what’s the solution? Ya gotta get you lines at different sizes.
Whether you are illustrating digitally or traditionally, you need to vary your line width – it’s incredible how much it can improve a drawing.
When I’m drawing on paper, I like to start with a black Posca 5M for my thick lines, and then move down to a thinner pen like an Artline .4.
Lines come in all different shapes and sizes and they play an incredibly important role in art and illustration (you can learn more about how to use lines over here).
When I’m creating digital illustrations, I make sure my pressure sensitivity on my wacom stylus dictates the width of my brush strokes. Check out my article on how to setup your brush settings for line art in Photoshop.
Put Together Your Portfolio
Hokay. This is a pretty big ingredient if you want to become an illustrator. It doesn’t matter how many degrees in Illustration you may have. An illustrator is nothing without proof of his or her skill.
The best way to show that you are a consistent and skilled illustrator is to have a portfolio of work.
An illustration portfolio can take many forms:
- Social media (Instagram, Behance, Dribbble)
- A Personal Website (WordPress, Squarespace, Wix etc.)
- Digital PDF
Let’s talk about these!
Social Media
I am faaar too busy lazy to list off all social media platforms, but I’ve got a few that I feel are definitely worth checking out: Instagram, Behance and LinkedIn.
There are so many free places online where you can put your portfolio. I’d say the most mainstream platform is Instagram. Insta is a VERY visual platform, which is perfect for illustrators.
You’ll be competing with many other artists for people’s attention, but on the bright said, Instagram has an absolute butt-load of traffic.
If you are wanting to create a strong artist brand on Instagram, you could perhaps keep your illustrations on one account and have a separate account where you can post photos of your bircher muesli and $18 poached eggs.
And make sure you chuck in a few hashtags so that people can find you. HASHTAG BLESSED! etc. etc.
Behance
I don’t use Behance, but it looks very cool. Unlike Instagram, Behance is exclusively for artists and designers to showcase their work.
It’s also got some LinkedIn elements thrown in – you can search for jobs (and post jobs as well). There you have it – Behance: Like LinkedIn but more fun.
And speaking of LinkedIn…!
LinkedIn might sound too corporatey for a creative artist like yourself, but it may actually be a great place to show your work. A lot of hiring is done on LinkedIn, so it’s definitely worth considering.
I don’t have any data to back this up, but I feel that LinkedIn is a platform that often gets overlooked by artists and illustrators who want to showcase their work, which means you may have less competition when the recruiters come a’lookin for talent.
A Personal Website
You might be thinking – what’s the point in paying for a website when I can just use Instagram?
That’s a decent question. And I have a decent answer!
Although some prospective clients will be looking only on Instagram for their preferred illustrator, they still like to see that illustrators have their own website.
Why?
Because a website will show people that you are a professional who is super serious about your work. It tells people that you spent time and effort to build and develop your own little part of the internet, where people can go to find you and your artwork.
To build a website you need three things:
- a domain name (your website address, eg. superartyfuntimes.com)
- web hosting (this is where your website and its files are stored)
- a publishing platform (the actual website, like WordPress, Squarespace or Wix)
Choosing a domain name
Make sure you pick a good name and domain extension for your website.
- The best option is to get a .com (Pleeeease try and find an available .com!)
- If you are strictly working locally, you could also use your country’s extension: co.uk, .com.au, .co.za, .co.nz etc.
- .net isn’t great, but okay
- Try and avoid .org, .biz
On a personal note, I used to have a domain that was .org (cos the .com was taken). And people would always go woahhh Malcolm why did you choose .org? why not .com?! Why Malcolm WHY?!
It’s cos the .com was flippen taken!. Man I don’t want people to ask you every day why you don’t have a .com, so please do your best to get one.
Luckily for me, I bought malcolmmonteith.com, before any other Malcolms tried to. But if your name is taken, you could get a bit creative and add an arty title for your site. For example, MalcolmDraws.com, MonteithArt.com, etc.
Choosing Web Hosting
There are so many website hosting providers out there to choose from. Personally, I just use a local company over in sunny Brisbane.
Before you sign up for web hosting, take a look at which platform you want to go with. This is because a lot of platform packages offer the option of web hosting with them.
Otherwise, if you want to set up your hosting independently, I know a lot of people in the blogging community who use Bluehost. It’s pretty easy to use and comes with decent customer support.
So if you’re going for a platform like WordPress, then Bluehost will definitely do the trick (at a low price).
Choose a Publishing Platform
We are all different, folks. Different web platforms appeal to different types of people. Some people want a customizable solution, while others want a straight outta the box solution!
Customizable Option
I have tried a bunch of platforms over the years. My absolute favorite is WordPress, because it’s very customizable and gives the user a lot of control.
WordPress is free, but you will need to pair it with a theme as well (to make your website a lil’ pretty). Jump on Google and see if there are any themes that would be a good match for your illustrations. Alternatively, just take a look at the templates over at Themeforest.
WordPress themes usually cost no more than $100, but there are also many free themes on the market. So if you’re on a budget, this could be a good option for you.
Straight Out of the Box Option
Hoo boy! So many options. So it helps for you to do a bit of research on this one. But there are two big players in the market today.
Squarespace
Since Squarespace push their ads to me every five minutes, I’d feel bad if I didn’t mention them first.
Squarespace’s designs are amazing, they offer 24/7 customer support and it is also pretty affordable.
Squarespace, you are fantastic. Also, please stop sending me ads.
Wix
Do you know who ALSO loves aggressive ad campaigning? Wix. To their credit, it works, cos here I am talking about Wix.
I’ve had a look at some of their themes and their onboarding process. Similar level of quality to Squarespace, but a dollar more expensive if you’re paying monthly.
Oh, and unlike Squarespace, Wix has phone support – do not underestimate phone support!
Other Tips to Help You get Started
Manage Your Time Well
If you are wanting to get into freelancing, then make sure to allocate appropriate time to important tasks. Namely Deliverables, Networking/Communicating and Sleep.
Artists generally enjoy creating things… but in order to keep on getting paid to create things, you need to maintain relationships. The easiest way to keeping the jobs coming in is for you to do such a good with your clients that they will keep using you.
But apart from that obvious fact, please also take the time to check in with them every so often. Even if you’re just reaching out to say hi. That way you will continue to be in the front of their minds.
And of course, a good sleep goes a long way. It’s tempting to work late nights to get more done, but instead try and rest your mind and body regularly. It’ll make you a better illustrator in the long run!
Manage Your Finances
Paying your bills on time and affording food is your priority. If you are able to do this as an illustrator, then great!
But if you are trying to become an illustrator and the work is sporadic or the pay isn’t enough, then you need to find a different primary source of income. (And there is nothing wrong with that at alllll!)
It’s better to work a day job where money is steady, and then use your spare time and weekends to work on your illustrations.
Remember: You do not have to be a full time illustrator. But if you really want to do this full time, then just keep on working at in in your spare time until you have enough of a client base (and enough money) to be able to do it full time.
Finally, check out this article where I talk a bit more about managing money!
Conclusion!
Congrats if you are still reading this! In this article we have covered all of the necessary things you need to do to become an illustrator. In summary:
- You do not have to get a formal education to become an illustrator
- Make sure you are drawing every day
- Don’t be afraid to make mistakes
- Incorporate storytelling into your illustrations
- Familarise yourself with industry software (and a graphics tablet!)
- Have a portfolio that you are proud to show people
- Have a social media presence (but don’t let it take up all of your time)
- Build a personal website for your portfolio and contact details
- Don’t just focus on creating pictures – make sure you are building good relationships with your clients
- Don’t forget to sleep
- Pay your bills on time – that might mean working in a non-illustrator job, which is perfectly okay! :) yes it’ll take up your time, but it’ll also make your journey as an illustrator a lot less stressful, and way more enjoyable!
Whether you are wanting to become a professional illustrator, or you simply want to learn it for fun, I hope this article has helped you in some way. If you have any questions, feel free to leave a comment below.
All the best!
Malcolm Monteith
Melbourne

6 thoughts on “How to Become an Illustrator [The Ultimate Guide!]”